This guide walks through barkoder_app_nativeScript, a NativeScript demo app built with the official barkoder-nativescript plugin.The goal was to build more than a basic scan screen. This app shows how to structure a practical NativeScript barcode app with:
- live camera scanning
- gallery image scanning
- multiple scan presets
- runtime scanner controls
- persistent per-mode settings
- scan history with saved thumbnails
- details and review screens
This project mirrors the same Barkoder demo flow used in the other framework ports, but the integration is fully NativeScript-specific.
Why NativeScript + barKoder
NativeScript is a strong fit when you want native mobile UI and native plugin access while staying in TypeScript.
In this app, NativeScript gives us:
- a native Barkoder camera view in XML layouts
- direct access to device features such as image picking and sharing
- native file storage for history and saved scan image
The barKoder SDK provides the scanning engine and specialized barcode features, including:
- 1D and 2D decoding
- MultiScan
- VIN scanning
- DPM scanning
- DotCode mode
- MRZ mode
- AR mode
What the app includes
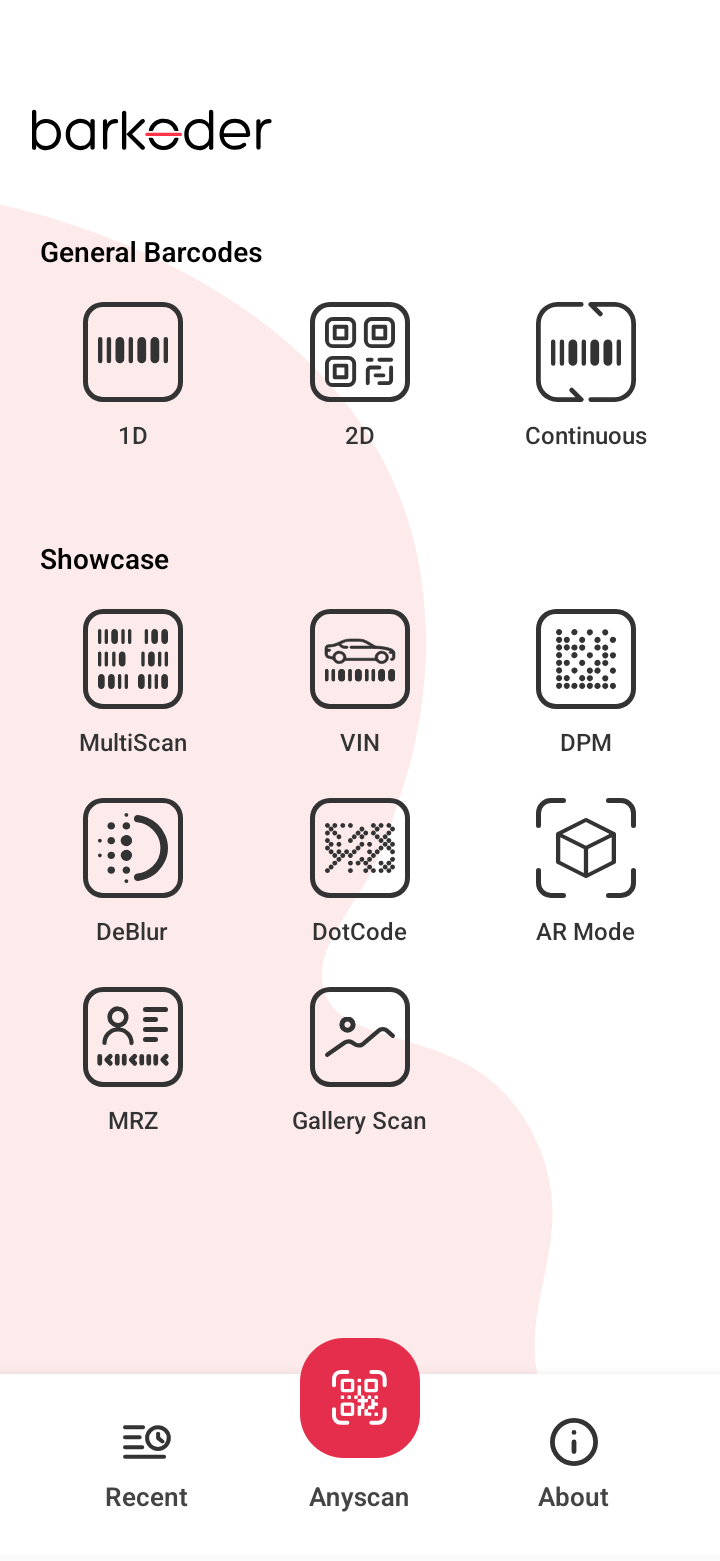
The app is organized into the same major screens as the other Barkoder demo apps:
- Home
- Scanner
- Details
- History
- About
From the home screen, users can launch:
- 1D
- 2D
- Continuous
- MultiScan
- VIN
- DPM
- DeBlur
- DotCode
- AR Mode
- MRZ
- Gallery Scan
Project setup
Install dependencies first: npm install
Then add your license key to .env:
BARKODER_LICENSE_KEY=YOUR_BARKODER_LICENSE_KEY
The app reads this value in app/config.ts:
export const BARKODER_LICENSE_KEY = process.env.BARKODER_LICENSE_KEY ?? '';
For Android builds: npm run build:android For iOS builds: npm run build:ios There is also a TypeScript validation command: npm run typecheck
The NativeScript app id is defined in nativescript.config.ts: id: 'com.barkoderapp.nativescript'
Your Barkoder license should match the app id used for the build.
The plugin stack
This project uses a small set of NativeScript packages:
- barkoder-nativescript
- @nativescript/imagepicker
- @nativescript/social-share
- @nativescript/core`
barkoder-nativescript powers scanning, @nativescript/imagepicker is used for gallery barcode scanning, and @nativescript/social-share is used for sharing CSV scan output.
A custom licensed Barkoder view
One NativeScript-specific detail is the custom component in app/components/licensed-barkoder-view.ts.
Instead of setting the license key separately in every screen, the app subclasses the Barkoder view and injects the key in the constructor:
export class LicensedBarkoderView extends (BaseBarkoderView as typeof View) {
  constructor() {
    super();
    (this as any).setLicenseKey(BARKODER_LICENSE_KEY);
  }
}
That component is then used directly in XML:
<Barkoder:LicensedBarkoderView id="barkoderView" class="scanner-view" />This keeps license setup centralized and makes the scanner screens cleaner.
App architecture
The project is split into a few clear areas:
- app/home for the launch screen and gallery scan entry
- app/scanner for live scanning UI and scan lifecycle
- app/details for single-result review
- app/history for stored scans
- app/about for device and version info
- app/services for history and settings persistence
- app/utils for scanner defaults and platform helpers
- app/vendor for Barkoder imports
The main scanner logic is concentrated in app/scanner/scanner-page.ts, while NativeScript XML files define the actual screen layouts.
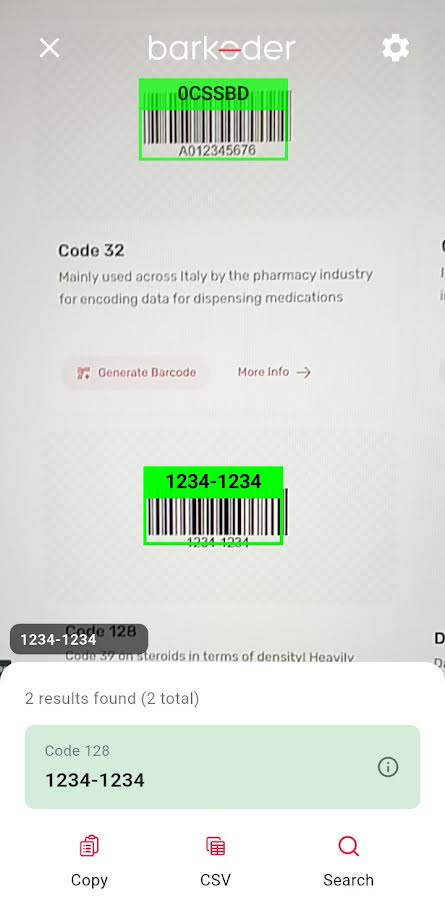
How live scanner startup works
The live scanner screen uses LicensedBarkoderView directly in app/scanner/scanner-page.xml.
When the page opens, scanner-page.ts:
- reads the selected mode from navigation context
- loads saved settings for that mode
- applies Barkoder configuration
- starts scanning
That startup is intentionally delayed slightly so the page is fully ready before scanner configuration kicks in:
setTimeout(() => {
  applyScannerConfiguration();
  startScanning();
}, 250);
The actual scan session uses Barkoder's callback-based API:
barkoderView.startScanning({
  async scanningFinished(results, thumbnails, resultImage) {
    ...
  },
});
Mode-based scanner behavior
Modes are defined in app/constants.ts, and each mode gets default enabled barcode types and scanner settings in app/utils/scanner-config.ts.
That includes:
- which decoders are enabled
- decoding speed
- resolution
- whether continuous scanning is enabled
- whether ROI is enabled
- AR-specific defaults
For example, VIN mode turns on a narrower ROI and VIN restrictions:
barkoderView.setEnableVINRestrictions(true);
barkoderView.setRegionOfInterest(ROI_VIN.x, ROI_VIN.y, ROI_VIN.width, ROI_VIN.height);
DPM mode enables Data Matrix DPM behavior:
barkoderView.setDatamatrixDpmModeEnabled(true);
barkoderView.setRegionOfInterest(ROI_DPM.x, ROI_DPM.y, ROI_DPM.width, ROI_DPM.height);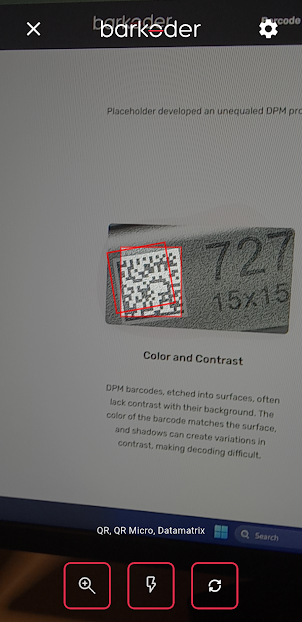
AR mode applies Barkoder AR configuration through dedicated SDK methods:
- setBarkoderARMode
- setBarkoderARLocationType
- setBarkoderARHeaderShowMode
- setBarkoderARoverlayRefresh
- setARDoubleTapToFreezeEnabled
This keeps the scanner page generic while still supporting highly specialized scanning flows.
Handling scan results
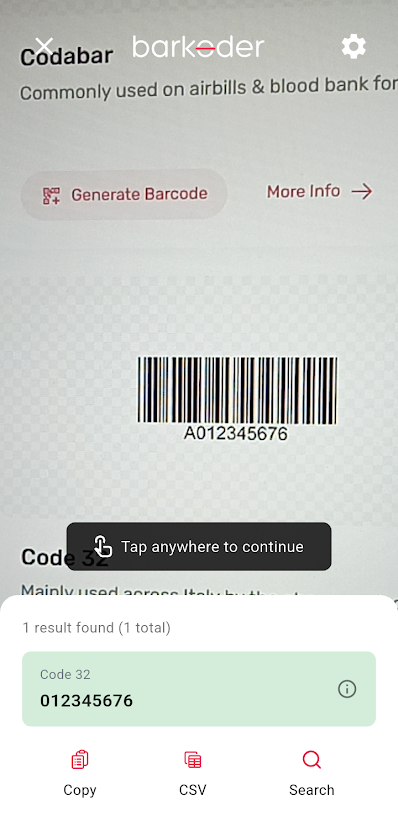
Results are processed in one place: startScanning() inside app/scanner/scanner-page.ts.
When valid results arrive, the app:
- pauses scanning in non-continuous flows
- stores the scanned items
- saves thumbnails or result images to history
- updates the result sheet
- shows a frozen image overlay when scanning is paused
This gives the app a more product-like experience than immediately continuing scanning after every decode.
NativeScript gallery image scanning
Gallery scanning is implemented differently from the live scanner flow.
The home page includes a hidden 1x1 Barkoder view:
<Barkoder:LicensedBarkoderView
  id="galleryBarkoderView"
  width="1"
  height="1"
  left="-10"
  top="-10"
  opacity="0" />
That hidden view is used only for image-based scanning.
The gallery flow in app/home/home-page.ts does this:
- opens the picker with
@nativescript/imagepicker - loads the selected image as an
ImageSource - converts it to base64
- applies a gallery-specific Barkoder config
- calls
galleryBarkoderView.scanImage(...) - saves results to history
- opens details or history depending on result count
The core image-scan call looks like this:
galleryBarkoderView.scanImage(base64Image, {
  scanningFinished(results) {
    ...
  },
});
This is a useful pattern because it keeps gallery scanning separate from the live camera screen while still reusing the same SDK.
Runtime scanner controls
The live scanner page supports runtime controls for:
- flash
- zoom
- front/back camera
- continuous scanning
- duplicate threshold
- decoding speed
- resolution
- ROI visibility
- barcode type toggles
- AR settings
These settings are rendered dynamically in the settings overlay and applied back into Barkoder through applyScannerConfiguration().
The scanner also supports:
- copying scanned results
- sharing CSV output
- expanding and collapsing the result sheet
- pausing and resuming scanning
Persistent settings and history
This NativeScript app persists data differently from the Cordova and Capacitor versions.
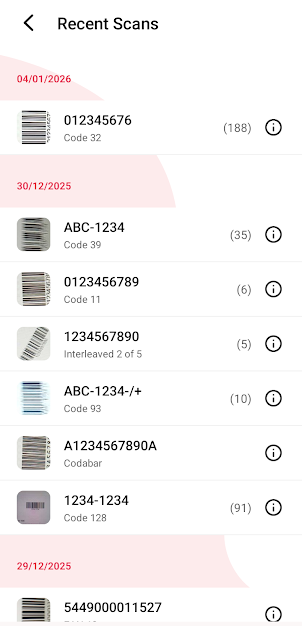
Per-mode settings are stored using ApplicationSettings in app/services/settings-service.ts.
Scan history is stored as a JSON file in the documents folder, and saved scan images are written into a dedicated scan_images folder through app/services/history-service.ts.
That means this build keeps:
- timestamped scan history
- repeated-scan counts
- stored thumbnail or result images
The history service also deduplicates by text + type, updating existing entries instead of creating noisy duplicates.
Native platform details
Because this is a NativeScript app, it runs as a real native mobile application rather than a web shell.
Android permissions are declared in App_Resources/Android/src/main/AndroidManifest.xml, including:
- android.permission.CAMERA
- android.permission.READ_MEDIA_IMAGES
- android.permission.READ_EXTERNAL_STORAGE
- android.permission.WRITE_EXTERNAL_STORAGE
iOS usage strings are defined in App_Resources/iOS/Info.plist, including camera and photo library access descriptions.
These permissions are required because the app supports both live camera scanning and gallery image scanning.
Performance notes
A few design choices in this project help scanner behavior on-device:
- ROI is used for specialized modes such as VIN, DPM, MRZ, and DotCode
- MultiScan enables result caching
- gallery mode uses more aggressive decoding defaults
- image results and thumbnails are enabled so the UI can show saved previews
- scanner settings are restored per mode instead of forcing one global configuration
If you adapt this app for production, those mode-level settings are the first place to tune for your own scanning environment.
Conclusion
barkoder_app_nativeScript shows how to integrate the barKoder SDK into a full NativeScript application instead of a minimal sample.
The most useful implementation patterns here are:
- wrapping license setup in a custom
LicensedBarkoderView - keeping scanner configuration mode-aware
- using a hidden Barkoder view for gallery scanning
- storing history and images in the device file system
- separating UI layout in XML from scanner behavior in TypeScript
If you are building with NativeScript and need enterprise-grade barcode scanning, this project is a practical base for a production-style Barkoder integration.
Resources
- barKoder: https://barkoder.com/
- Trial license: https://barkoder.com/trial
- NativeScript docs: https://barkoder.com/docs/v1/nativescript
- NativeScript installation guide: https://barkoder.com/docs/v1/nativescript/nativescript-installation
- NativeScript API reference: https://barkoder.com/docs/v1/nativescript/nativescript-api-reference
- NativeScript examples: https://barkoder.com/docs/v1/nativescript/nativescript-example