You can make your own Shopping Cart App with the barKoder SDK
This guide is a Beginner’s Guide to Getting Started With Android Shopping Cart by utilizing barKoder's Mobile Barcode Scanner SDK.
Here is the project that you can download - Shopping Cart BKD
Creating a new Android Studio project is simple, but crucial. Take our advice and follow a few simple steps, the first of which is to set up your Android Studio and create a project :)
The following are the things that we'll examine:
- How to start your first Android studio project;
- What parameters to choose for developing a mobile app;
- What settings should you choose so that the majority of Android users may utilize your app?
- A quick overlook of the MainActivity (the first activity) and step by step for all other Activities;
- A quick overlook of the XML file;
- Configuring your Android studio for a better view;
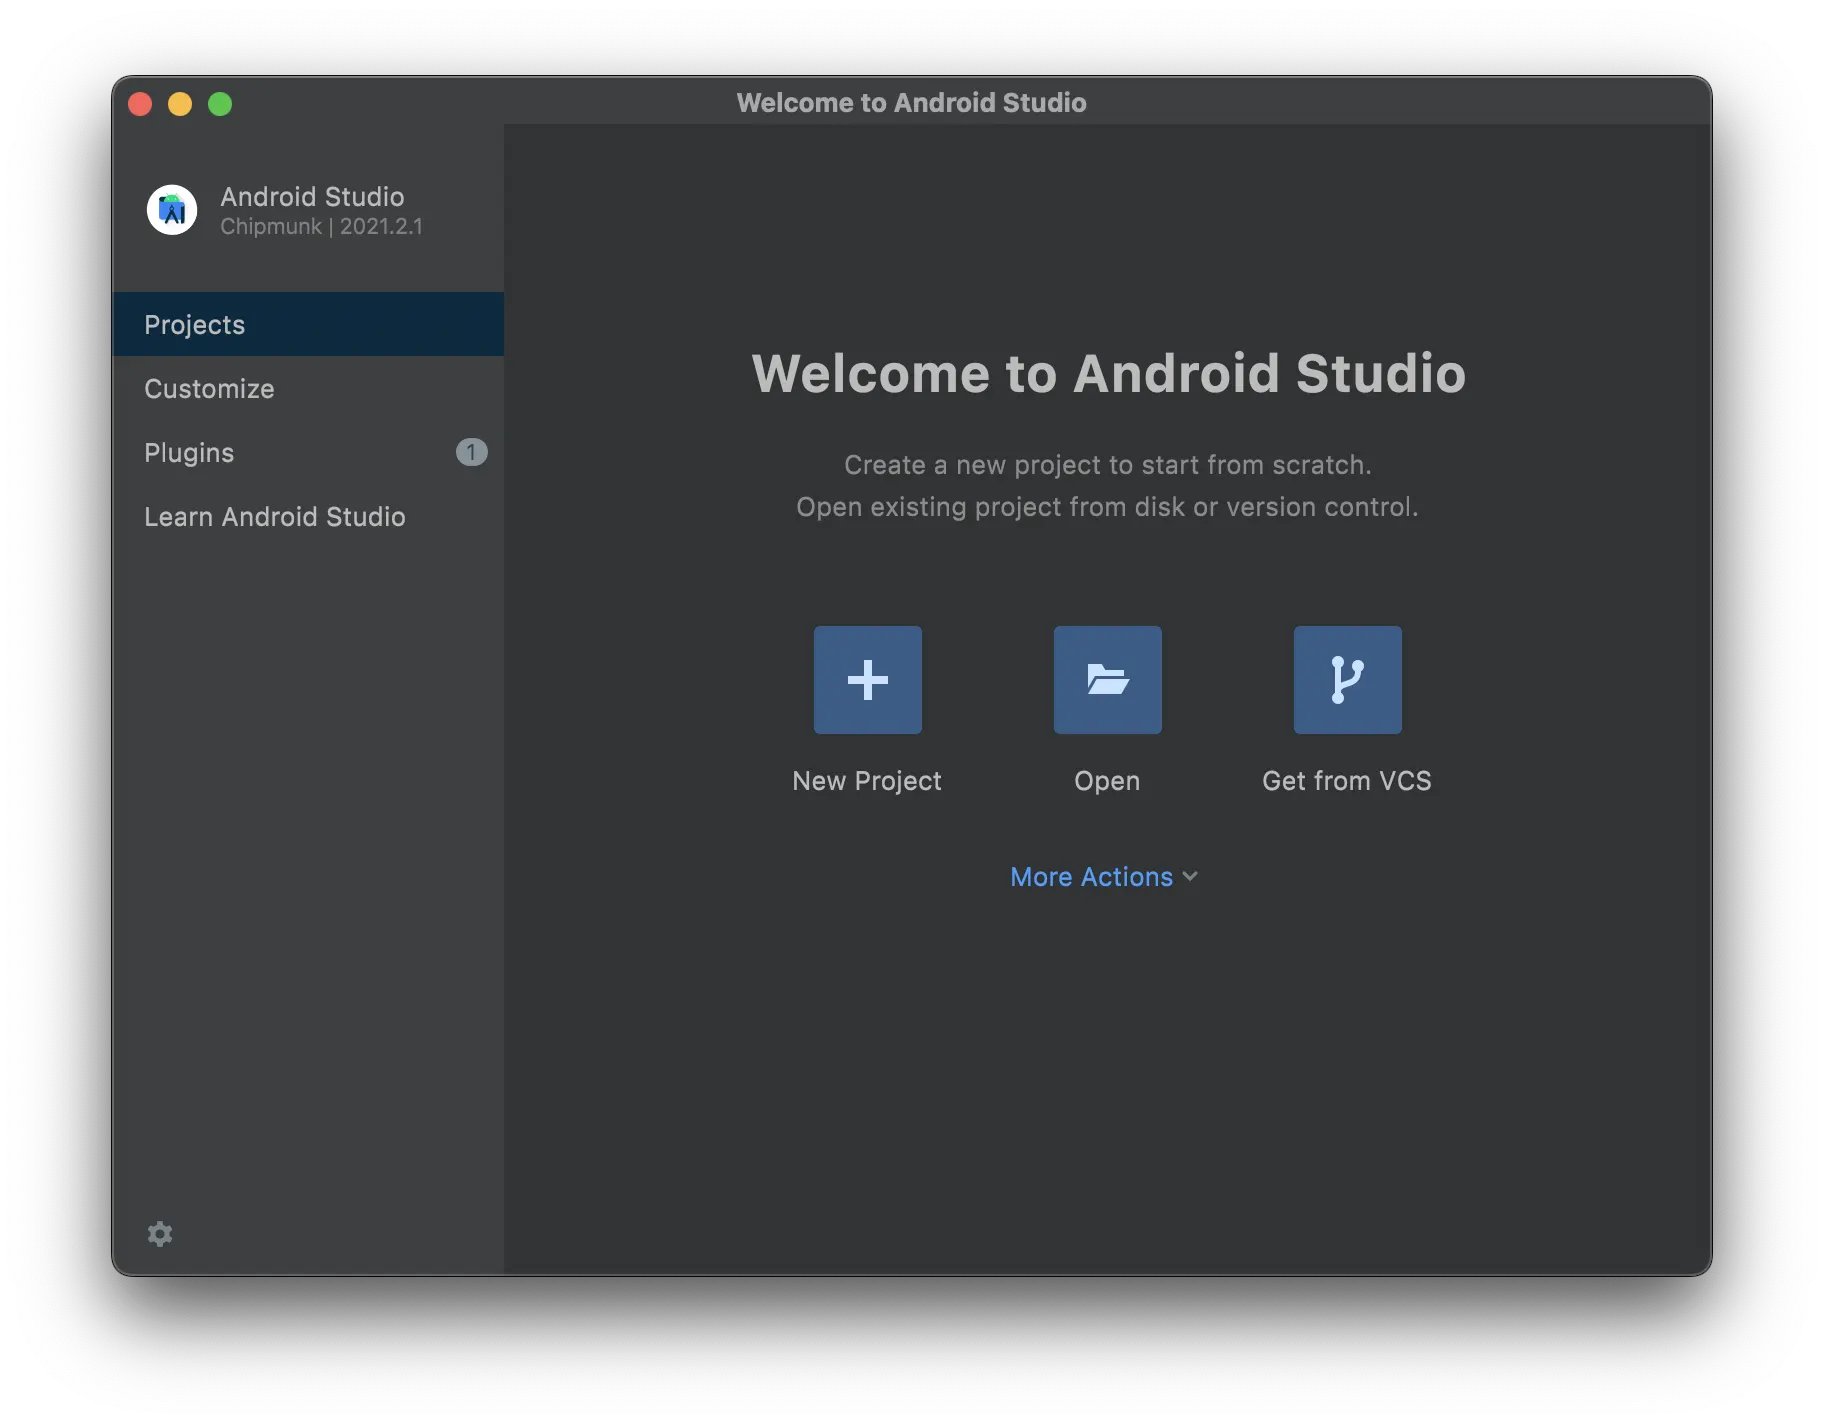
Before we proceed, please download and install Android Studio. Once you're done please proceed to opening the program.
A step-by-step walk-through for your first Android studio project.
When the "Welcome to Android Studio" box appears, navigate to the right and click the “Start a new project in Android Studio” option.
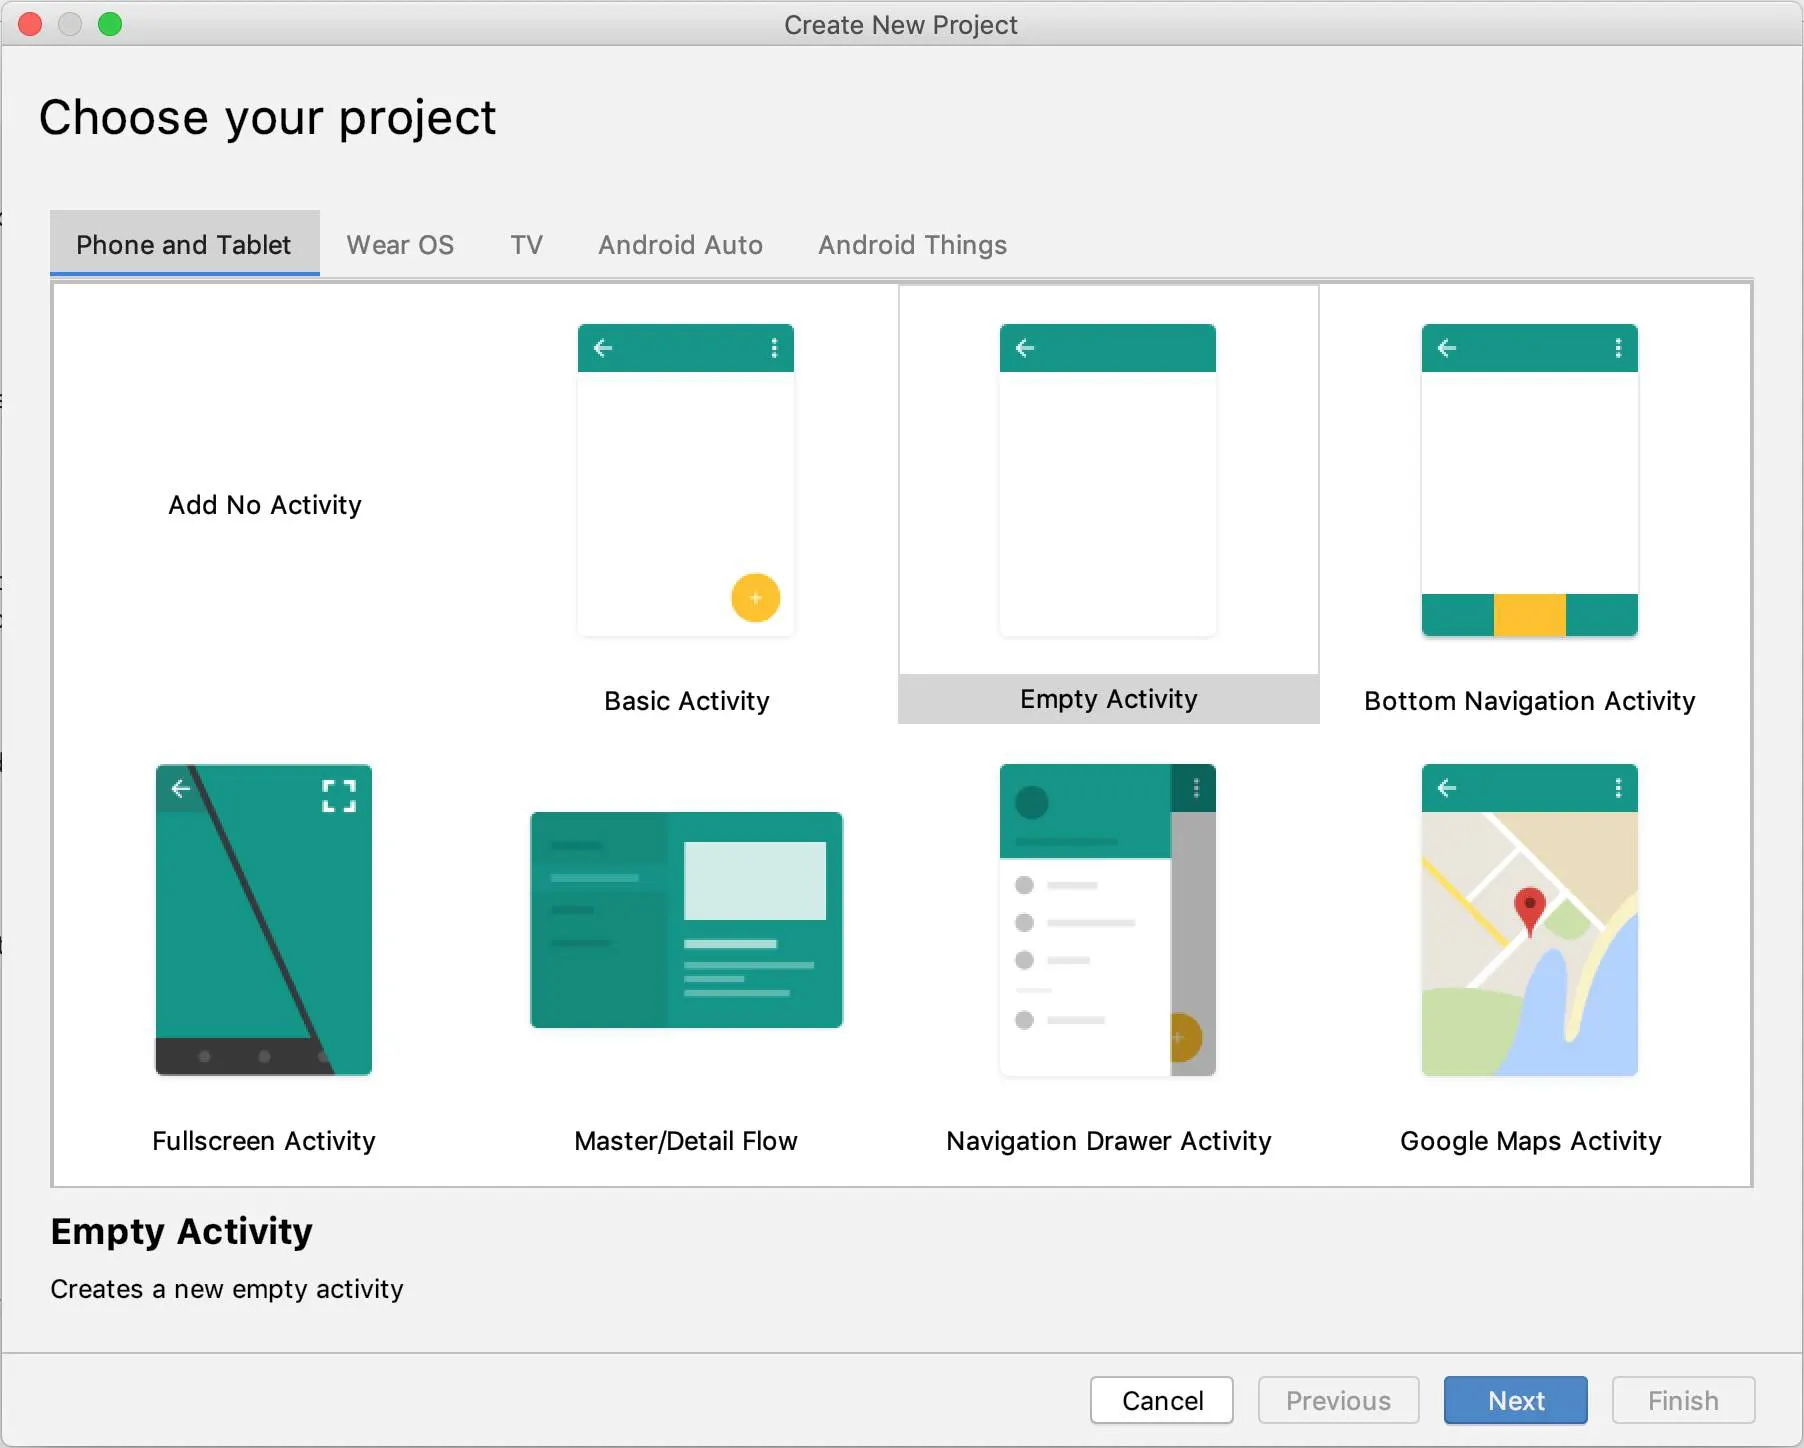
First screen
First things first, we need to choose the type of Android device on which we want to build our app. The following are your options: phones, tablets, TVs, and Android-compatible wearables. As an illustration, we'll pick “Phone and Tablet” and begin a phone-related Android studio project. Make sure you choose an empty activity in the space below. then select next.
Second screen
In this screen, you need to name the project. You may keep the package name alone at this time as there is no need to modify it.
You must now choose the language in which you want to code. Since Kotlin is becoming increasingly popular, it is also the default choice. However, for our example, we will use Java, so click the drop-down option and pick Java.
Then there's a drop-down option where you may select an API level. The API level is a value that indicates the API revision of the framework. When developing new mobile apps, it is usually best to target one of the most popular Android versions. It is prudent to choose a solution that covers around 80% of devices. This ensures that a greater proportion of Android users will be able to utilize your app.
Click Finish to create the Android studio project and wait for the project to load.
If you've come to this point, you've started a new Android Studio project. Android Studio creates one layout XML file and one Java file. You can see the MainActivity.Java file is already open.
MainActivity
Typically, one activity in an app is specified as the main activity, which is the first screen to appear when the user launches the app. Each activity can then start another activity to perform different actions. MainActivity.Java file is located in the Java folder that contains the Java source code files which are separated by package names.
XML file
XML stands for eXtensible Markup Language, which is a way of describing data using a text-based document. Because XML is extensible and very flexible, it's used for many different things, including defining the UI layout of Android apps.
For more information please see this link - all possible resource types.
Congratulations, now you know the Android Studio basics, Main Activity and XML file, so now let's configure your Shopping App embedded with our barKoder SDK which you can do yourself by following the steps below:
Android Manifest
The Android manifest file helps to declare the permissions that an app must have to access data from other apps. The Android manifest file also specifies the app's package name which helps the Android SDK while building the app.
<uses-permission android:name="android.permission.CAMERA" />
Shopping Cart with barKoder SDK
First Activity (Splash Screen)
As we outlined above, the first activity is MainActivity, or in our case this is MainActivity (Splash), an Android Splash Screen which is the first screen visible to the user when the application's launched. The splash screen is one of the most vital screens in the application since it's the user's first experience with the application, and here you can add the App Logo or other information about the application, advertising, etc.
But before we start with this we need to integrate the barKoder mobile barcode reader SDK into the project. To do that, register on the barKoder Developer Portal and download the Android SDK from the repository.
In this MainActivity, you can see that there is just a sample code containing a progress bar and a code from where you can go to the second activity (ListActivity) and in our case a 2 second timer.
To go to another Activity we are using the Internet - The intent is to perform an action on the screen. It is mostly used to start an activity, send broadcast receivers, start services and send messages between two activities. There are two intents available in android, Implicit Intents and Explicit Intents. Here is a sample example to start a new activity with old activity.
new Handler().postDelayed(new Runnable() {
            @Override
            public void run() {

                Intent intent = new Intent(MainActivity.this, ListActivity.class);
                intent.addFlags(Intent.FLAG_ACTIVITY_NO_ANIMATION);
                startActivity(intent);
                finish();
            }
        }, SPLASH_DISPLAY_LENGTH);
Second Activity (ListActivity)
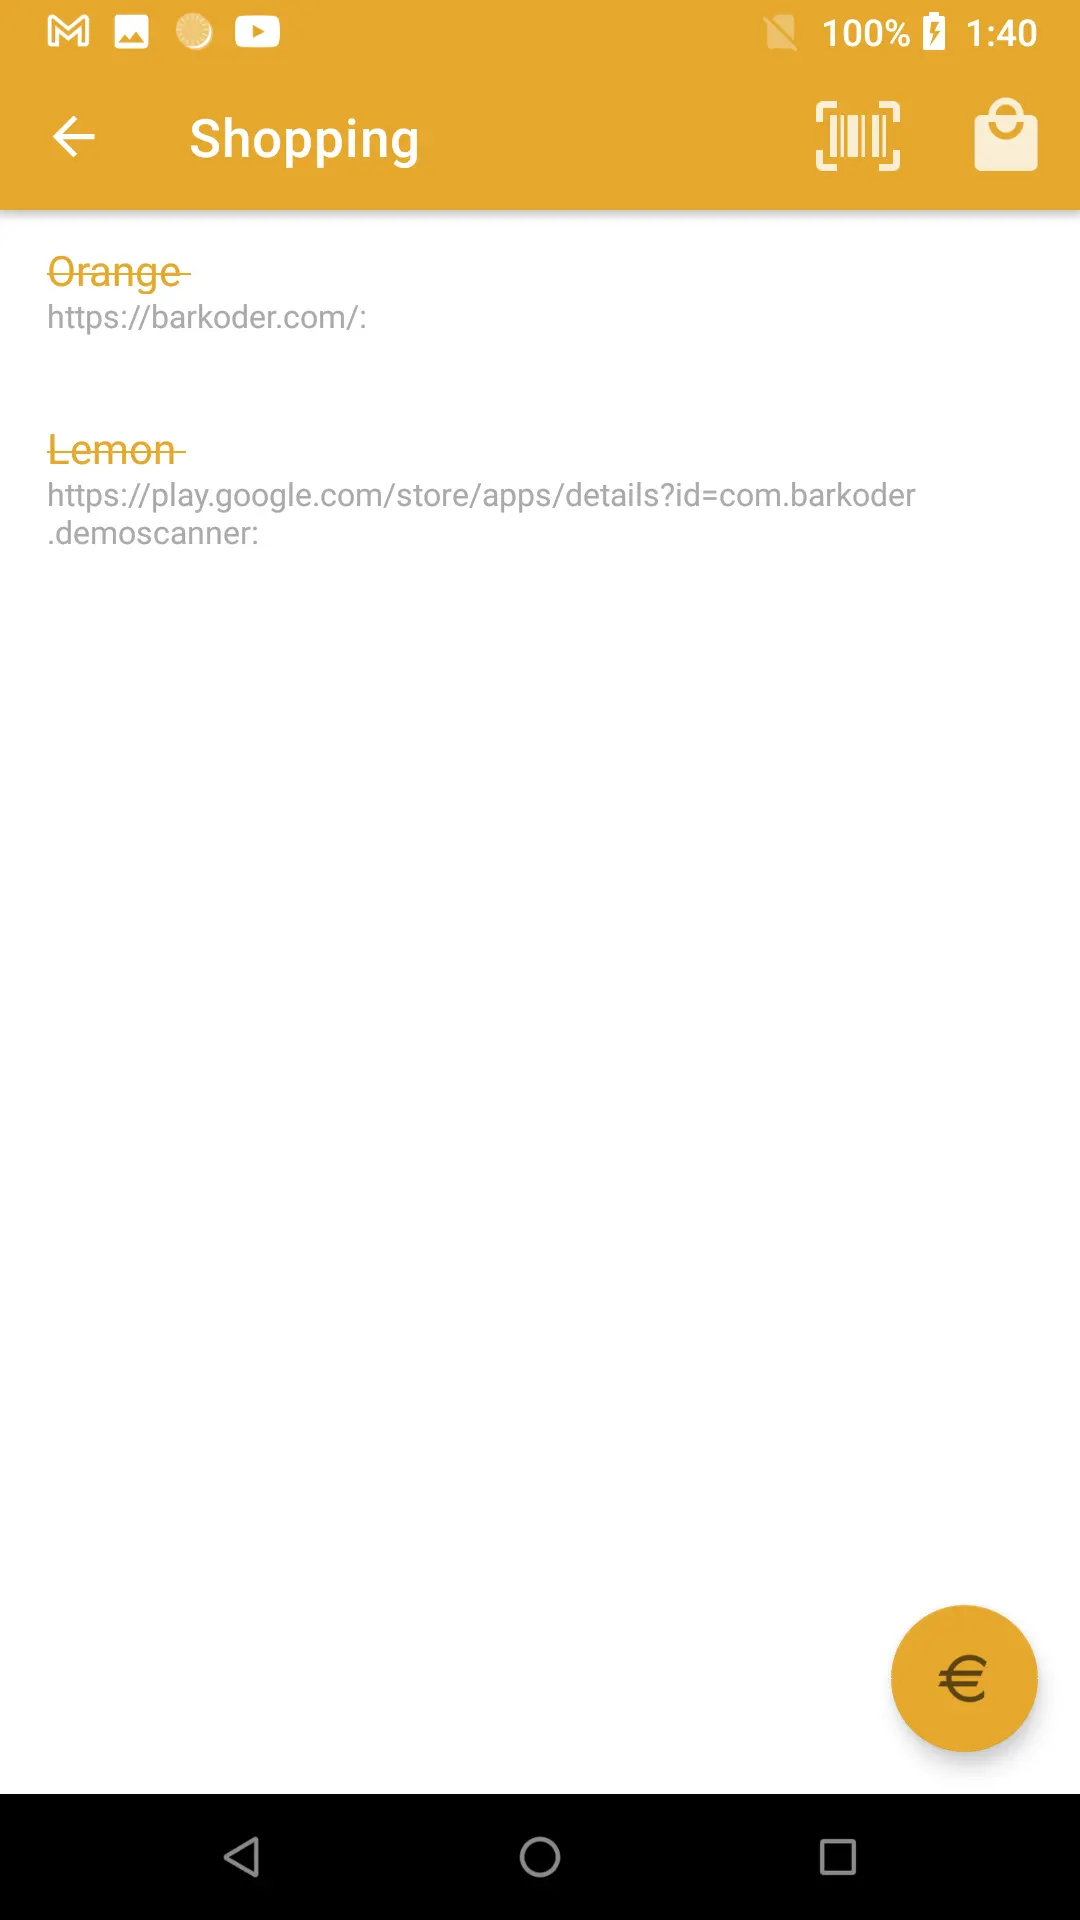
Welcome to the Second Activity (ListActivity) and this is where the magic happens.
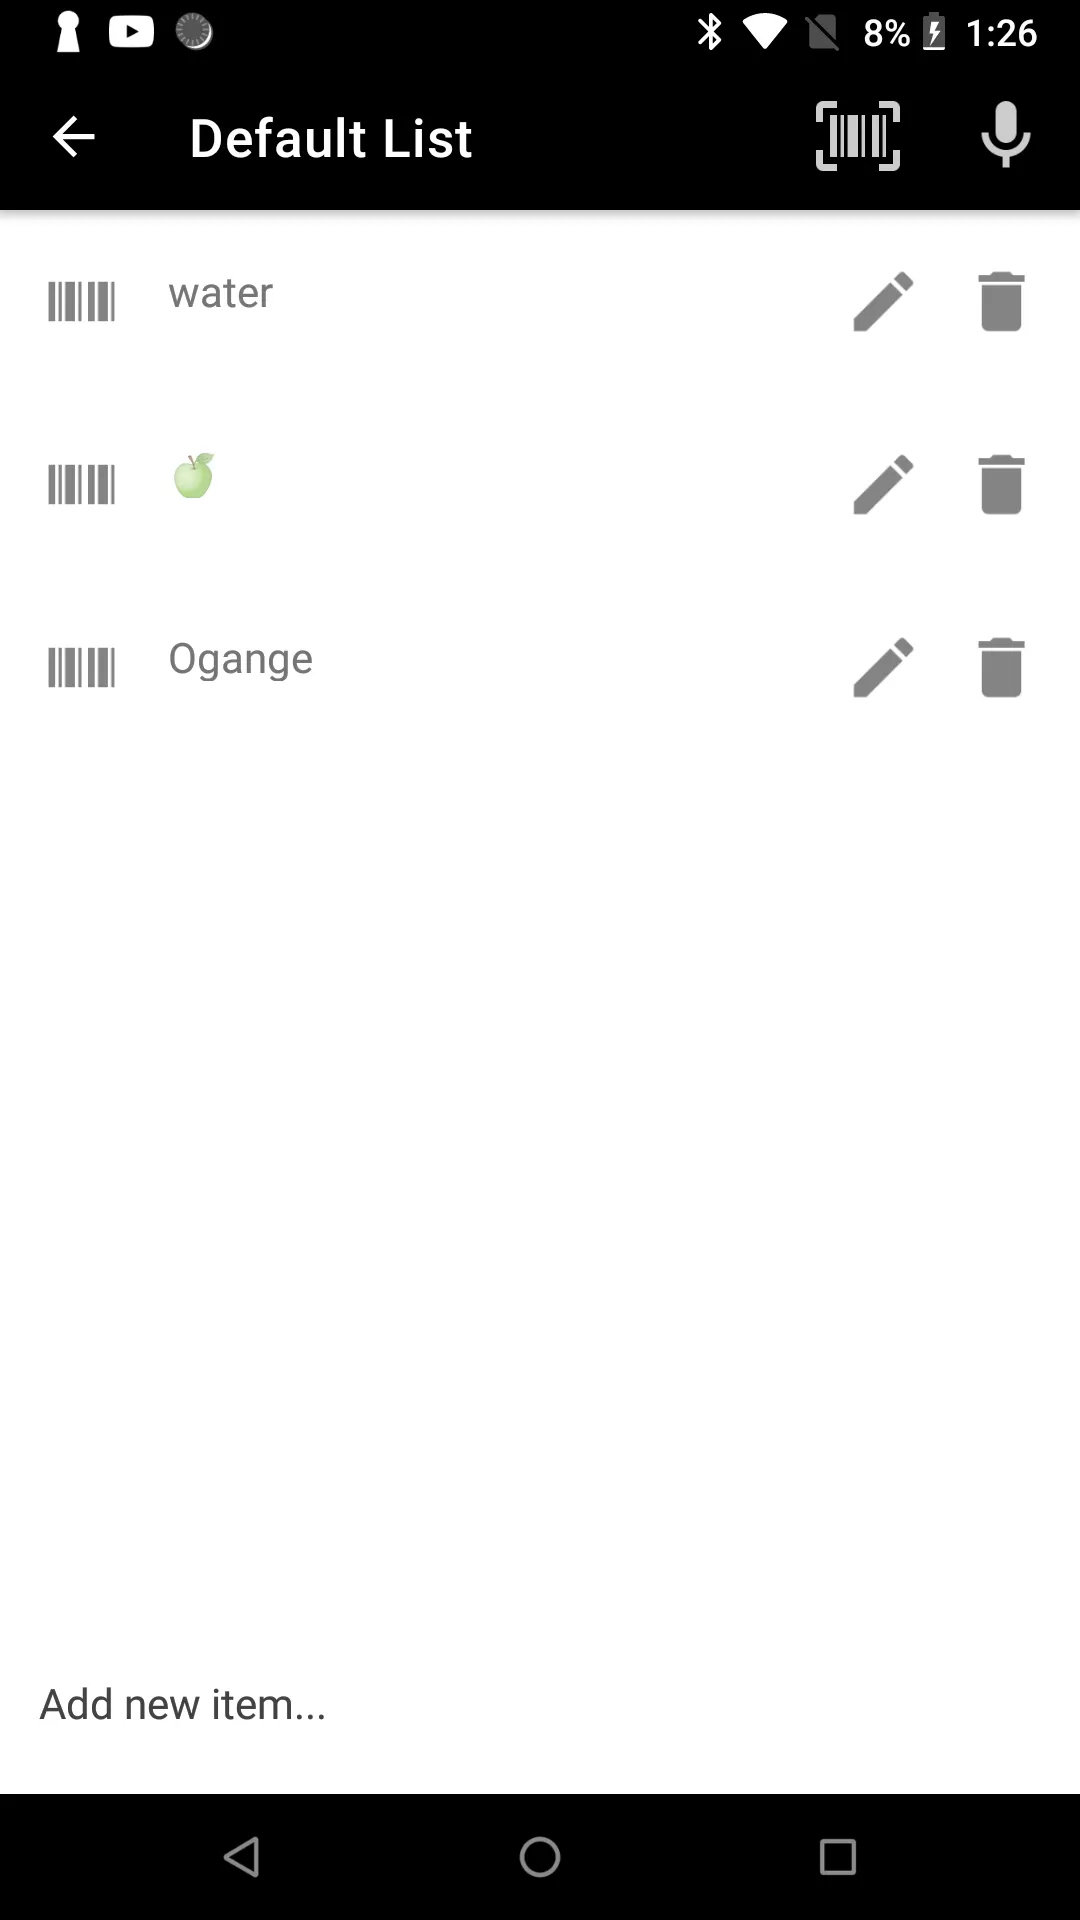
As you can see there are two images above and this is from ListActivity, the one on the left is DefaultList from where you can add, edit, and delete the product that you like to add to your Shopping List, while the screen on the right is DrawerLayout and there are three buttons that present the different possible Activities, but we will discuss this latter on because now we will focus on the ListActivity.
- The first way to add a product to the list is to use the EditText and do to that you can reference the code below:
        editTxt.setOnKeyListener(new View.OnKeyListener() {
            @Override
            public boolean onKey(View v, int keyCode, KeyEvent event) {
                InputMethodManager imm = (InputMethodManager) getSystemService(INPUT_METHOD_SERVICE);
                imm.hideSoftInputFromWindow(
                        ListActivity.this.editTxt.getWindowToken(), 0);
                if ((event.getAction() == KeyEvent.ACTION_DOWN)
                        && (event.getKeyCode() == KeyEvent.KEYCODE_ENTER)) {

                    ListObject object = new ListObject();
                    object.name = editTxt.getText().toString();

                    arrayList.add(object);
                    saveArray();
                    adapter.notifyDataSetChanged();
                    editTxt.setText("");
                    editTxt.clearFocus();


                }
                return false;
            }

        });
- Another way to do that is to use the Google Voice that you can see on the action bar.
    // google talk
    private void promptSpeechInput() {
        Intent intent = new Intent(RecognizerIntent.ACTION_RECOGNIZE_SPEECH);
        intent.putExtra(RecognizerIntent.EXTRA_LANGUAGE_MODEL,
                RecognizerIntent.LANGUAGE_MODEL_FREE_FORM);
        intent.putExtra(RecognizerIntent.EXTRA_LANGUAGE, Locale.getDefault());
        intent.putExtra(RecognizerIntent.EXTRA_PROMPT,
                getString(R.string.speech_prompt));

        try {
            startActivityForResult(intent, REQ_CODE_SPEECH_INPUT);
        } catch (ActivityNotFoundException a) {
            Toast.makeText(getApplicationContext(),
                    getString(R.string.speech_not_supported),
                    Toast.LENGTH_SHORT).show();
        }
    }
The third and most important thing, since this Shopping Cart contains the barKoder SDK, is to click on the barcode icon in the action bar, which will open the barcode reader that will grant you the opportunity to scan any of the supported barcode symbologies. After a successful barcode scan, the content will be added as a new product in the default list.
barkoderView.setVisibility(View.VISIBLE);
                barkoderView.startScanning(this);
 private void createBKDConfig() {
        barkoderView.config = new BarkoderConfig(getApplicationContext(), "LicenseKey",
                new Barkoder.LicenseCheckListener() {
                    @Override
                    public void onLicenseCheck(Barkoder.LicenseCheckResult licenseCheckResult) {
                        Log.i("License info", licenseCheckResult.message);
                    }
                });

        barkoderView.config.getDecoderConfig().SetEnabledDecoders(new Barkoder.DecoderType[]{
                Barkoder.DecoderType.Aztec,
                Barkoder.DecoderType.AztecCompact,
                Barkoder.DecoderType.QR,
                Barkoder.DecoderType.QRMicro,
                Barkoder.DecoderType.Code128,
                Barkoder.DecoderType.Code93,
                Barkoder.DecoderType.Code39,
                Barkoder.DecoderType.Codabar,
                Barkoder.DecoderType.Code11,
                Barkoder.DecoderType.Msi,
                Barkoder.DecoderType.UpcA,
                Barkoder.DecoderType.UpcE,
                Barkoder.DecoderType.UpcE1,
                Barkoder.DecoderType.Ean13,
                Barkoder.DecoderType.Ean8,
                Barkoder.DecoderType.PDF417,
                Barkoder.DecoderType.PDF417Micro,
                Barkoder.DecoderType.Datamatrix
        });
    }
After you add a new product to your list, you can add the options to edit or delete the product and to achieve this, you need this code below:
- Edit the name of the product.
 holder.editname.setOnClickListener(new View.OnClickListener() {
                @SuppressLint("RestrictedApi")
                @Override
                public void onClick(View v) {

                    final AlertDialog.Builder adb = new AlertDialog.Builder(ListActivity.this);
                    adb.setMessage("Are you sure you want to edit the name for " + arrayList.get(finalPosition).name);
                    final EditText input = new EditText(ListActivity.this);
                    InputMethodManager imm = (InputMethodManager) getSystemService(Context.INPUT_METHOD_SERVICE);
                    imm.toggleSoftInput(InputMethodManager.SHOW_FORCED, 0);
                    input.requestFocus();

                    adb.setView(input, 100, 50, 100, 0);
                    adb.setNegativeButton("Cancel", new AlertDialog.OnClickListener() {
                        @Override
                        public void onClick(DialogInterface dialog, int which) {
                            InputMethodManager imm = (InputMethodManager) getSystemService(Context.INPUT_METHOD_SERVICE);
                            imm.hideSoftInputFromWindow(input.getWindowToken(), 0);
                        }
                    });

                    InputMethodManager immm = (InputMethodManager) getSystemService(Context.INPUT_METHOD_SERVICE);
                    immm.hideSoftInputFromWindow(input.getWindowToken(), 0);
                    adb.setPositiveButton("Ok", new AlertDialog.OnClickListener() {
                        public void onClick(DialogInterface dialog, int which) {


                            ListObject object = arrayList.get(finalPosition);
                            object.name = input.getText().toString();
                            saveArray();
                            adapter.notifyDataSetChanged();
                            input.setText("");


                            Toast.makeText(getApplicationContext(), "The name is changed", Toast.LENGTH_SHORT).show();
                            InputMethodManager imm = (InputMethodManager) getSystemService(Context.INPUT_METHOD_SERVICE);
                            imm.hideSoftInputFromWindow(input.getWindowToken(), 0);


                        }
                    });
                    adb.show();


                }
            });


            return convertView;
        }
- Delete the item from the list
            holder.delete.setOnClickListener(new View.OnClickListener() {
                @Override
                public void onClick(View v) {

                    AlertDialog.Builder adb = new AlertDialog.Builder(ListActivity.this);
                    adb.setMessage("Are you sure you want to delete " + arrayList.get(finalPosition).name);
                    adb.setNegativeButton("Cancel", null);
                    adb.setPositiveButton("Ok", new AlertDialog.OnClickListener() {
                        public void onClick(DialogInterface dialog, int which) {

                            arrayList.remove(finalPosition);
                            adapter.notifyDataSetChanged();
                            saveArray();
                        }
                    });
                    adb.show();


                }
            });
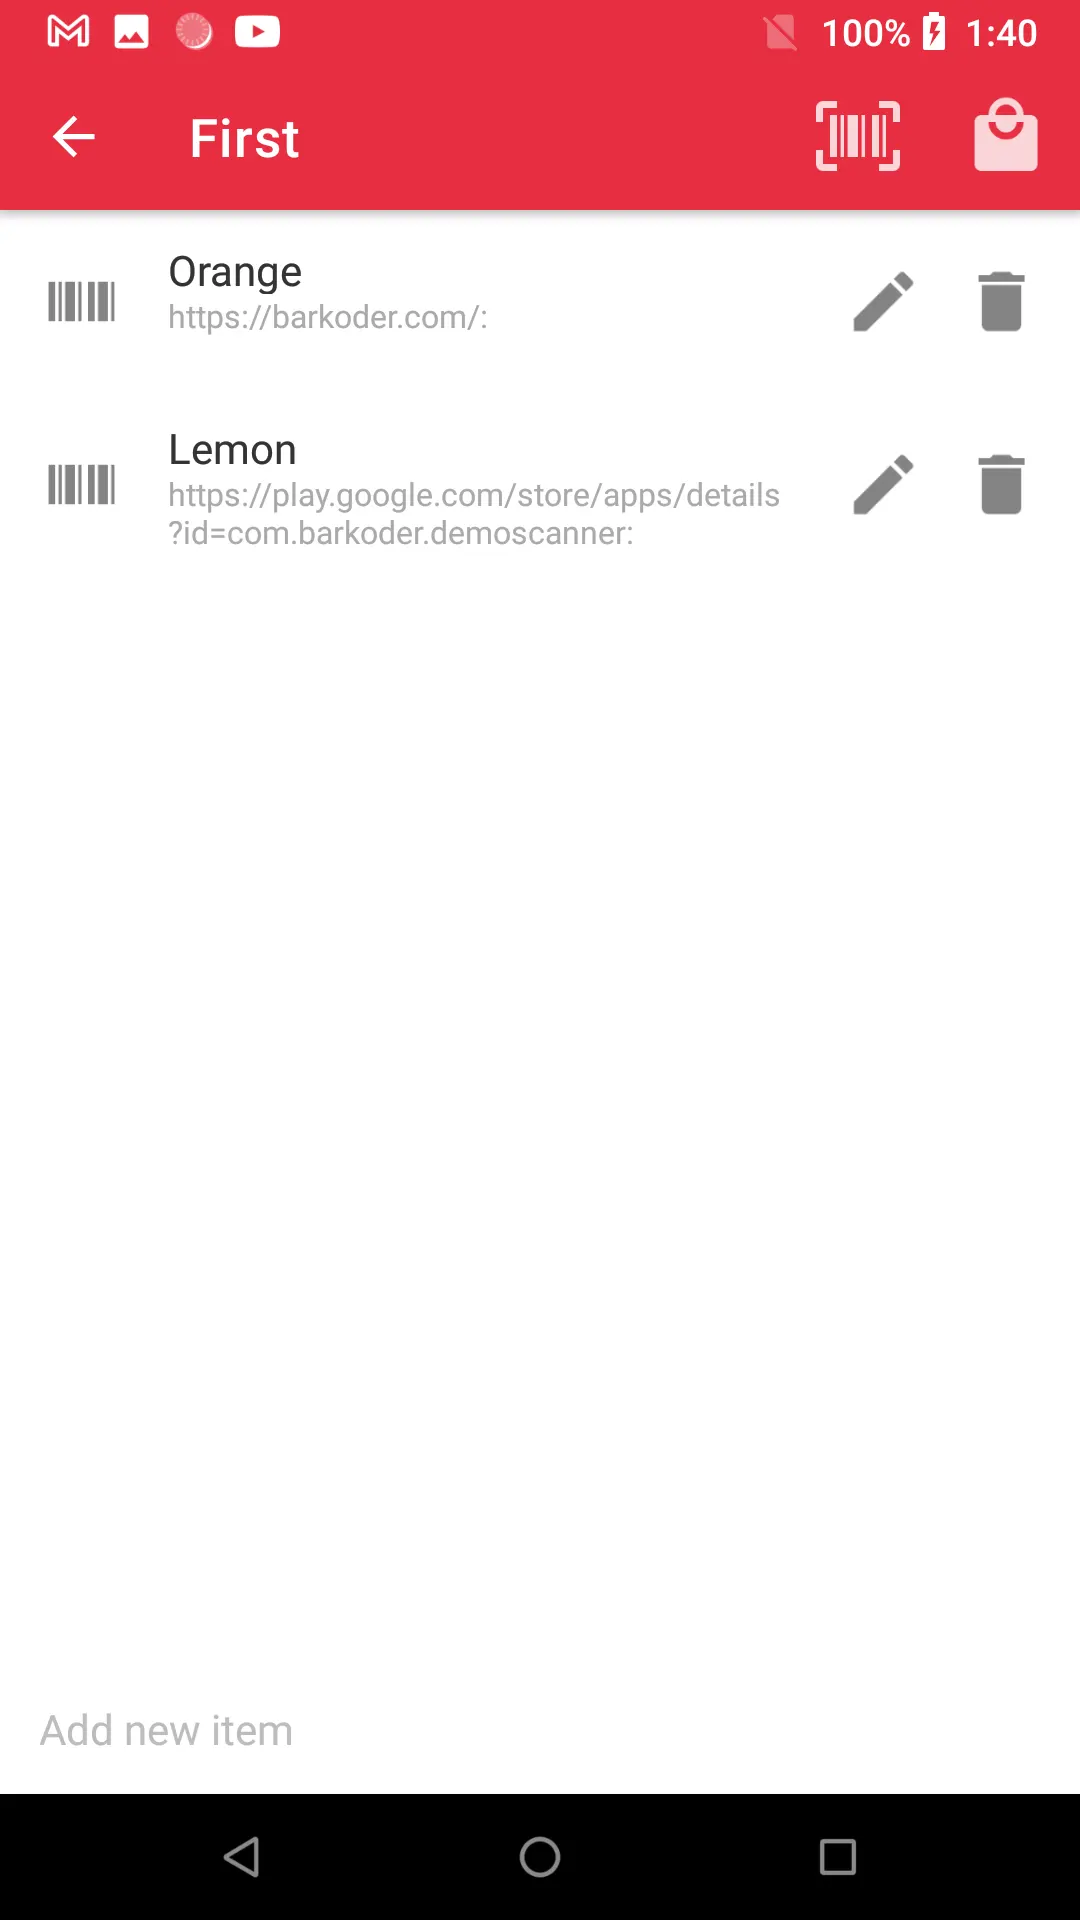
- If you click on a particular list then you can share this list:
        list.setOnItemClickListener(new AdapterView.OnItemClickListener() {
            @Override
            public void onItemClick(AdapterView<?> parent, View view, int position, long id) {

                AlertDialog.Builder builder = new AlertDialog.Builder(ListActivity.this);

                if (!arrayList.get(position).type.equals(""))
                    builder.setMessage(arrayList.get(position).type + ": " + arrayList.get(position).code);


                builder.setCancelable(false);
                builder.setTitle(arrayList.get(position).name);
                builder.setPositiveButton("DONE", new DialogInterface.OnClickListener() {
                    @Override
                    public void onClick(DialogInterface dialog, int which) {


                    }
                });

                builder.setNegativeButton("SHARE", new DialogInterface.OnClickListener() {
                    @Override
                    public void onClick(DialogInterface dialog, int which) {

                        Intent sharingIntent = new Intent(android.content.Intent.ACTION_SEND);
                        sharingIntent.setType("text/plain");
                        String shareBody = "Here is the share content body";
                        sharingIntent.putExtra(android.content.Intent.EXTRA_SUBJECT, "Like to Share this barcode");
                        sharingIntent.putExtra(android.content.Intent.EXTRA_TEXT, shareBody);
                        startActivity(Intent.createChooser(sharingIntent, "Share via"));
                    }
                });

                AlertDialog dialog = builder.create();

                dialog.show();
            }
        });
- If you click on the image on the left (barKoder icon) it opens the scanner and then you can change the type for that particular item
            holder.imgCode.setOnClickListener(new View.OnClickListener() {
                @Override
                public void onClick(View v) {
                    AlertDialog.Builder adb = new AlertDialog.Builder(ManageListActivity.this);
                    adb.setMessage("Add barcode for this item " + arraymanagelist.get(finalPosition).name);
                    adb.setNegativeButton("Cancel", null);
                    adb.setPositiveButton("Add", new AlertDialog.OnClickListener() {
                        public void onClick(DialogInterface dialog, int which) {
                            barkoderView.startScanning((results, bitmap) -> editListItem(results, position));
                        }
                    });
                    adb.show();


                }
            });
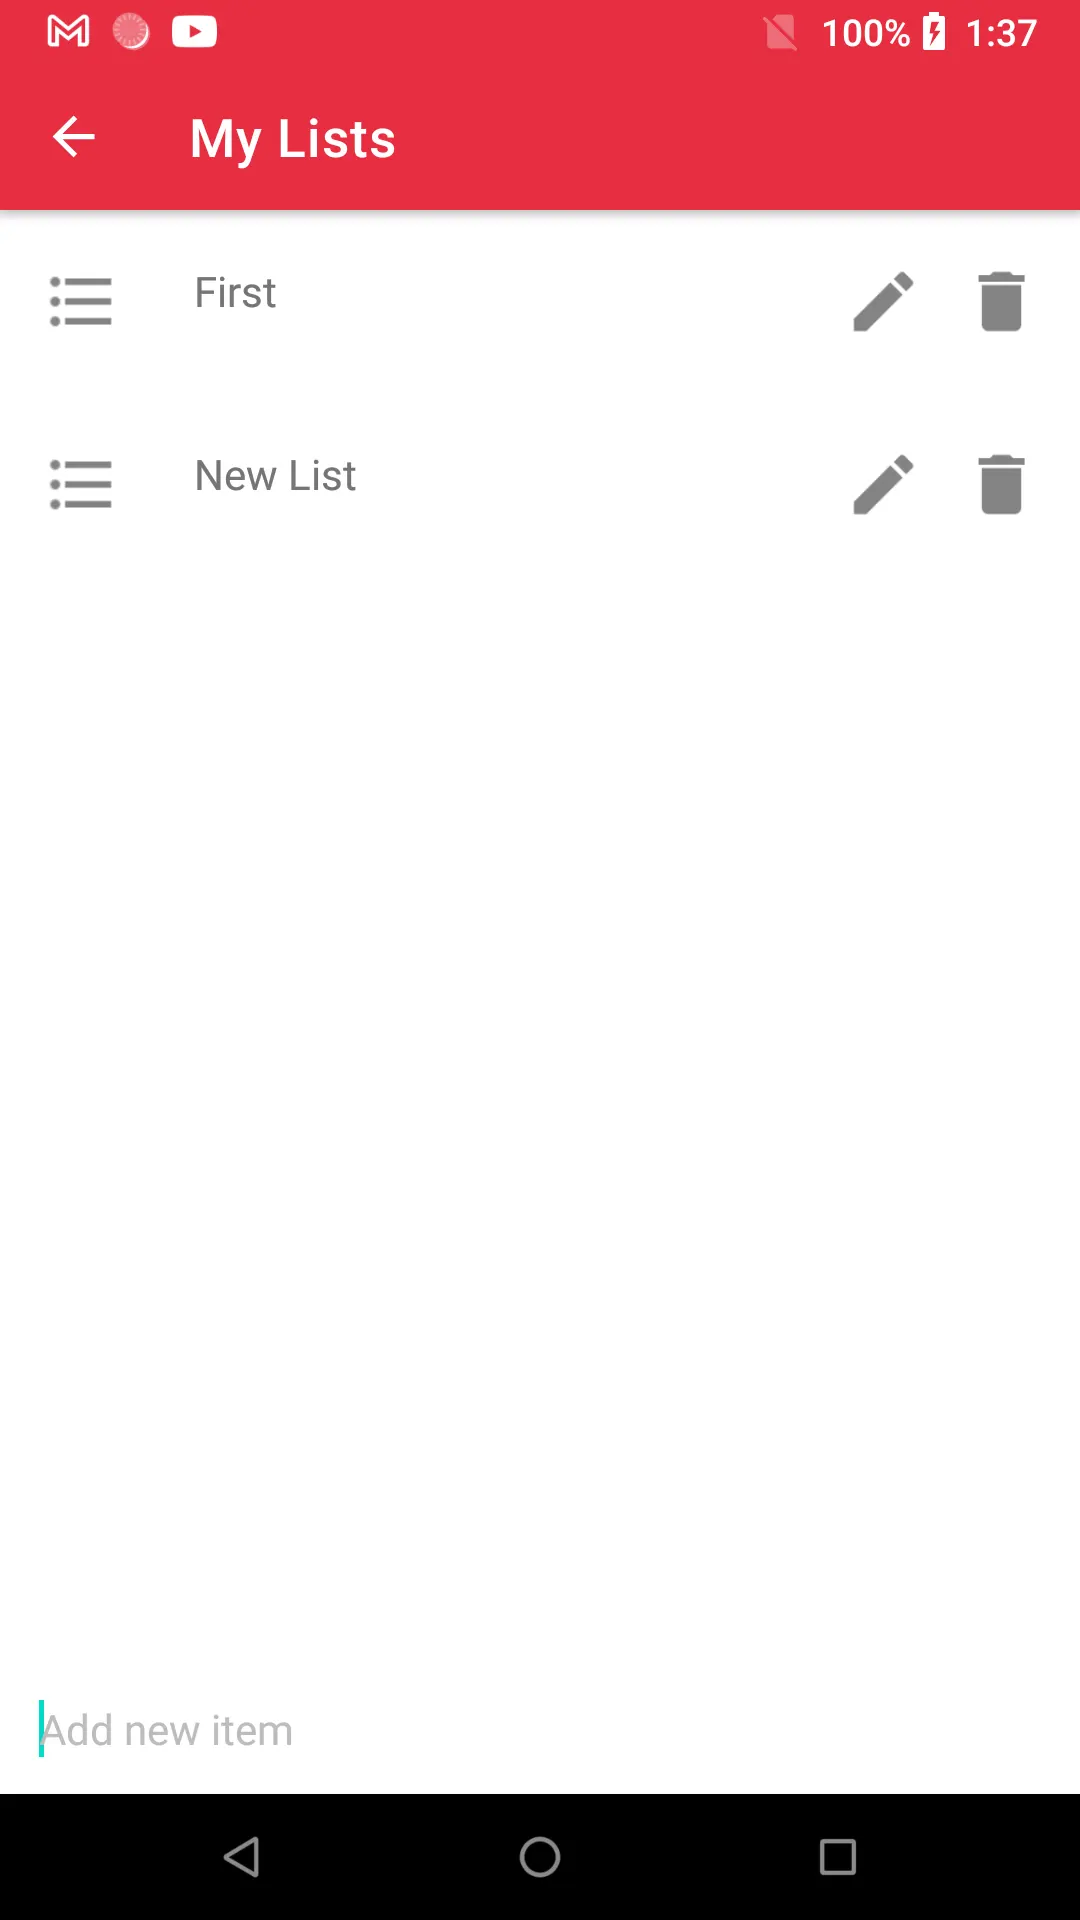
Third Activity (ManageListActivity)
Welcome to the third Activity (ManageListActivity)
In this Activity, you can create more lists with products inside. And of course, you can edit, or delete the lists.
When the list is done and ready for shopping please click the icon on the right side of the action bar (shopping icon)
The code that you can use to change the mode from regular to shopping mode can be found on onOptionsItemSelected:
  public boolean onOptionsItemSelected(MenuItem item) {
        switch (item.getItemId()) {
            case android.R.id.home:
                finish();
                break;

            case R.id.scun_manage_list:
                barkoderView.setVisibility(View.VISIBLE);
                barkoderView.startScanning(this);
                break;
 case R.id.shopping:


                if (click) {
                    getSupportActionBar().setBackgroundDrawable(new ColorDrawable(getResources().getColor(R.color.list)));
                    if (Build.VERSION.SDK_INT >= Build.VERSION_CODES.LOLLIPOP) {
                        Window w = getWindow();
                        w.clearFlags(WindowManager.LayoutParams.FLAG_TRANSLUCENT_STATUS);
                        w.addFlags(WindowManager.LayoutParams.FLAG_DRAWS_SYSTEM_BAR_BACKGROUNDS);
                        w.setStatusBarColor(this.getResources().getColor(R.color.list));
                        getSupportActionBar().setTitle("List");
                        new_items.setVisibility(View.VISIBLE);
                        button_done.setVisibility(View.GONE);

                    }

                } else {
                    getSupportActionBar().setBackgroundDrawable(new ColorDrawable(getResources().getColor(R.color.accentcolor)));
                    if (Build.VERSION.SDK_INT >= Build.VERSION_CODES.LOLLIPOP) {
                        Window w = getWindow();
                        w.clearFlags(WindowManager.LayoutParams.FLAG_TRANSLUCENT_STATUS);
                        w.addFlags(WindowManager.LayoutParams.FLAG_DRAWS_SYSTEM_BAR_BACKGROUNDS);
                        w.setStatusBarColor(this.getResources().getColor(R.color.accentcolor));
                        new_items.setVisibility(GONE);
                        button_done.setVisibility(View.VISIBLE);
                        getSupportActionBar().setTitle("Shopping");

                    }


                }
                for (ManageListObject mso : arraymanagelist) {
                    mso.checked = false;
                }
                adapter.notifyDataSetChanged();
                click = !click;

                break;
            default:
                return false;
        }
        return true;
    }
The information that is saved in the list of all Activity can be performed with this sample code (SharedPreferences ):
    public boolean saveArray() {
        SharedPreferences sp = PreferenceManager.getDefaultSharedPreferences(this);
        SharedPreferences.Editor mEdit1 = sp.edit();

        mEdit1.putInt("list_" + list_id + "_itemcount", arraymanagelist.size());


        for (int i = 0; i < arraymanagelist.size(); i++) {
            mEdit1.remove("list_" + list_id + "_item_" + i);
            try {
                JSONObject cacheJSON = new JSONObject();

                cacheJSON.put("name", arraymanagelist.get(i).name);
                cacheJSON.put("code", arraymanagelist.get(i).code);
                cacheJSON.put("type", arraymanagelist.get(i).type);
                cacheJSON.put("list_id", list_id);


                mEdit1.putString("list_" + list_id + "_item_" + i, cacheJSON.toString());
            } catch (JSONException e) {
                e.printStackTrace();
            }
        }

        return mEdit1.commit();

    }
And to load the list with its items you need to call the following function:
    public void loadArray(Context mContext) {
        SharedPreferences mSharedPreference1 = PreferenceManager.getDefaultSharedPreferences(mContext);
        arraymanagelist.clear();
        int size = mSharedPreference1.getInt("list_" + list_id + "_itemcount", 0);

        for (int i = 0; i < size; i++) {
            try {
                JSONObject cacheJSON = new JSONObject(mSharedPreference1.getString("list_" + list_id + "_item_" + i, ""));
                ManageListObject object_manage_list = new ManageListObject();
                object_manage_list.name = cacheJSON.getString("name");
                object_manage_list.code = cacheJSON.getString("code");
                object_manage_list.type = cacheJSON.getString("type");
                object_manage_list.list_id = cacheJSON.getInt("list_id");

                arraymanagelist.add(object_manage_list);
            } catch (JSONException e) {
                e.printStackTrace();
            }
        }


    }
Fourth and Fifth Activity (Session and Information)
In any application, you will need an Activity from where you can market your product, in our case this is the Information button but in most cases, you will find this in a section most likely named About. In our case it is a single TextView.
TextView tv = (TextView)findViewById(R.id.information);
        tv.setText(" Enter your text here ");
Session Activity is the last one and here you can find all the Shopping Lists that are completed. For example after you create a list to go shopping, and click done after the end of the shopping session, this list is sent to this Activity so this is where you can find all previously completed lists :)
You have a button on the right side of the row which you can use to delete the finished list. To do that you have to remove the list from the listview with the code below:
 holder.txt_invoice_delete.setOnClickListener(new View.OnClickListener() {
                    @Override
                    public void onClick(View v) {
                        AlertDialog.Builder adb = new AlertDialog.Builder(SessionsActivity.this);
                        adb.setMessage("Are you sure you want to delete " + arraysessions.get(position).name);
                        adb.setNegativeButton("Cancel", null);
                        adb.setPositiveButton("YES", new AlertDialog.OnClickListener() {
                            public void onClick(DialogInterface dialog, int which) {

                                arraysessions.remove(position);
                                adapter.notifyDataSetChanged();
                                saveArray();
                            }
                        });
                        adb.show();
                    }
The Android AlertDialog can be used to display the dialog message with OK and Cancel buttons. It can be used to interrupt and ask the user about his/her choice to continue or discontinue. Android AlertDialog is composed of three regions: title, content area, and action buttons.
In Android applications, ActionBar is the element present at the top of the activity screen. It is a salient feature of a mobile application that has a consistent presence over all its activities. It provides a visual structure to the app and contains some of the most frequently used elements for the users.
An example of how to change the Name or the Color of the Action bar can be found in this Activity:
 getSupportActionBar().setDisplayHomeAsUpEnabled(true);
            getSupportActionBar().setTitle("Sessions");
            getSupportActionBar().setBackgroundDrawable(new ColorDrawable(getResources().getColor(R.color.material_actionbar)));

            Window w = getWindow();
            w.clearFlags(WindowManager.LayoutParams.FLAG_TRANSLUCENT_STATUS);
            w.addFlags(WindowManager.LayoutParams.FLAG_DRAWS_SYSTEM_BAR_BACKGROUNDS);
            w.setStatusBarColor(this.getResources().getColor(R.color.material_actionbar));
This concludes our guide on how to use the barKoder Mobile Scanner SDK in a Shopping Cart App. Later on, you will see how useful this can be in other cases. In the end, remember Android is fun.
Enjoy coding!