barKoder Installation Guide for Android Barcode Reader SDK
To utilize our SDK on Android, follow these simple steps to integrate it into your Android project.
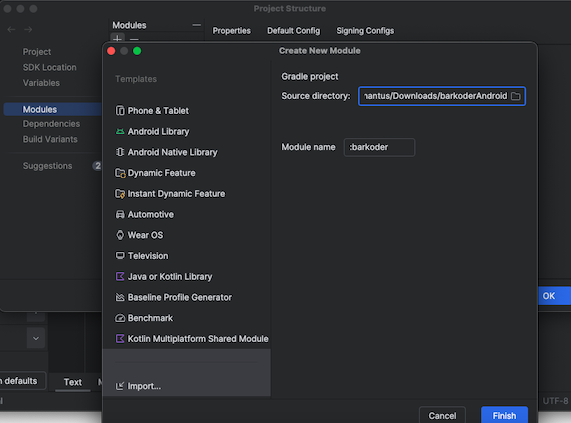
Import barkoder as module in Groovy DSL #
Import Module #
Start by importing the 'barkoder' module as displayed in the instructions.
Please note, the source directory path should refer to the 'barcoder' folder that contains both 'barkoder.aar' and 'build.gradle', not directly to the 'barkoder.aar' file.
Add Dependency #
In your app's build gradle file, add the following dependency:
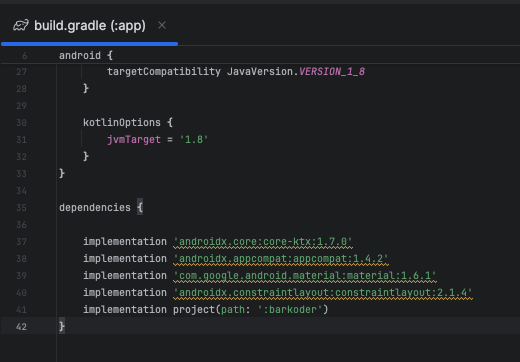
implementation project(path: ':barkoder')
Add Activity/Fragment #
In the layout.xml of the activity/fragment where you want the scanner to be visible, add the following code:

                <com.barkoder.BarkoderView
        android:id="@+id/bkdView"
    android:layout_width="match_parent"
    android:layout_height="match_parent" />
Create Barkoder Config #
Create a 'barkoder' configuration as per your requirements or choose from our templates.
                bkdView.config = BarkoderConfig(this, "LICENSE_KEY") {
   Log.i("LicenseInfo", it.message)
}
BarkoderHelper.applyConfigSettingsFromTemplate(
   this,
   bkdView.config,
   BarkoderConfigTemplate.INDUSTRIAL_1D,
   null
)
Add BarkoderResultCallback #
Implement the 'BarkoderResultCallback' interface to receive scanned results.
                class MainActivity : AppCompatActivity(), BarkoderResultCallback {
   ....

   override fun scanningFinished(results: Array<Barkoder.Result>, thumbnails: Array<Bitmap>, imageResult: Bitmap?) {
       Log.i("Scanned result", results[0].textualData)
   }
}
Start Scanning #
Finally, initiate the scanning process with the following command:
bkdView.startScanning(this)
Enabling Symbologies #
The following method can be used in order to enable individual symbologies from setActiveBarcodeTypes.
                private fun setActiveBarcodeTypes() {
    // There is option to set multiple active barcodes at once as array
    bkdView.config.decoderConfig.SetEnabledDecoders(
        arrayOf(
            Barkoder.DecoderType.QR,
            Barkoder.DecoderType.Ean13
            Barkoder.DecoderType.IDDocument // enable mrz
        )
    )
    // or configure them one by one
    bkdView.config.decoderConfig.UpcA.enabled = true
}
This comprehensive guide should enable a smooth integration of our SDK into your Android project. For any further assistance, feel free to reach out by utilizing the Ticketing System of the barKoder Developer Portal.
Licensing #
Import barkoder in Kotlin DSL Gradle (Android) #
Create libs folder in ur app directory #
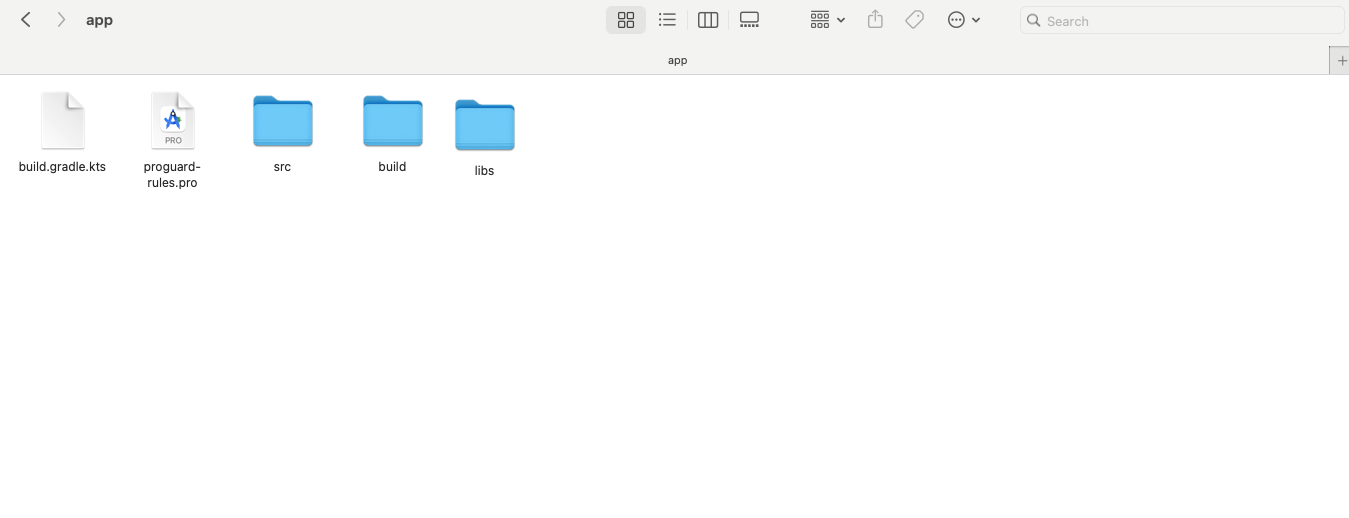
Put barkoder.aar in libs folder #

Add to build.gradle.kts (Module :app):
#
implementation(files("libs/barkoder.aar"))